Got a website that needs some major revamp? Or want to adjust some site functionalities of your site without blowing up the live site? Whatever experiments you want to do with your site, executing them in real time can be a disastrous feat.
You could get the site down, lose your rankings, and even lose business because of the downtime. That’s where you should use website cloning as a crutch to ensure changes are made and implemented smoothly.
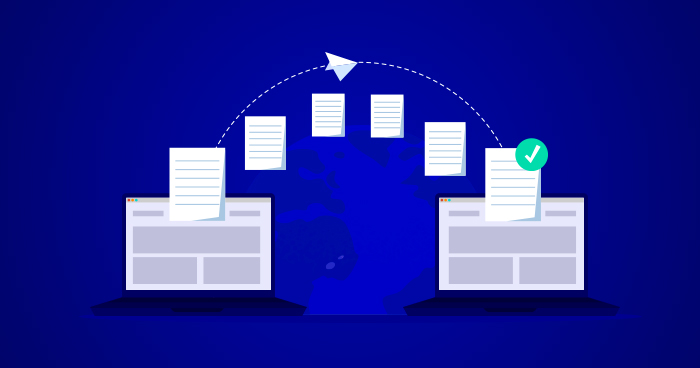
Website cloning means creating a replica of your existing website to make the changes. It lets developers and designers create blueprints, test compatibility, and perform updates safely before pushing the changes live on your live website.
In this article, I will cover a few of the use cases where website cloning can solve the problem and then discuss several ways to clone a WordPress website.
When and Why Do You Need to Copy a Website?
You’ll need to copy a website in different situations to ensure any changes are made and tested on the staging environment before they are pushed live.
This is particularly helpful for web agencies that run several websites across multiple WordPress hosting providers. Whenever an issue arises, they can create a copy of the client’s website, fix it, and push it live again.
Here are a few scenarios where you might need to clone a website.
- Compatibility Testing
- Moving to a New Server
- Back up Your Website
- Clone for a Similar Project
- Take a Website Live
1. Compatibility Testing
Compatibility testing involves checking whether the website components are working as expected and whether the entire code base can run on various hardware and/or software infrastructures.
Testing changes on a staging/cloned website instead of a live website is always recommended, mainly because untested themes and plugins could conflict with the existing installation and bring down the entire website.
Similarly, any custom changes in the code need to be tested at a staging/cloned site before they can be pushed to the live site.
2. Moving to a New Server
Migrating a live website to a new server is always a risky business. Doing so without cloning the site puts you at risk of losing everything.
If you want to transfer a website to PHP hosting or to a different hosting provider, you should create a clone by backing up website files and databases and importing the whole package to the new web hosting alternatives.
That way, if things go wrong, you always have an operational clone ready to take live.
3. Back up Your Website
Cloning is also used to back up a website (including web files and database) and keep it at an offsite location for disaster recovery. In the case of WordPress, many people use different WordPress backup plugins.
I will also cover the process of copying a website that can be used to create a backup of your website.
4. Clone for a Similar Project
If you are a web agency and build websites for clients, you may want to create a blueprint and copy it to another location to speed up the development process. Most of the time, these setups include theme & plugin configurations, code-level customizations, etc.
5. Take a Website Live
It’s common for developers to build websites on their preferred local environment and then clone the website to a web hosting server to ensure things do not break during the transition. This setup also requires a complete backup of website files and databases.
Before moving on to clone the website, there are several things that you need to align. This is to ensure that your cloning process isn’t interrupted because of some negligence.
Ready to Clone Your WordPress Website in 5 Steps?
Cloning a WordPress website on Cloudways is a simple process, and it can be done quickly and easily in just 5 steps.
Advanced Server Cloning
Are you tired of manually transferring apps and server settings every time you need to clone a server? You don’t have to do all that manual work. Why?
Because Cloudways has introduced an advanced server cloning feature that will revolutionize your workflow.
With the enhanced server cloning feature, Cloudways automates the duplication of all necessary server and app settings. From app credentials and domains to SSL certificates and CDN settings, everything is effortlessly copied over to the newly cloned server. This means more time for you to focus on what truly matters – your business.
Discover the power of advanced server cloning on Cloudways’ new UI and experience a seamless workflow like never before. Cloning a server is now just a few clicks away.
Read more about Advanced Server Cloning on Cloudways.
Advanced Server Cloning on the New UI
Discover the power of advanced server cloning on Cloudways’ new UI, streamlining your workflow like never before!
What Are the Prerequisites for Cloning a Website?
You’ll need the right tools and software to ensure the process runs without any hassle. Whichever process you choose. Some measures that you absolutely must have:
1. Access to Staging and Production Environments
Cloning the website to make the necessary changes has two parts: staging environment and production environment.
The staging environment is the cloned version where you make all the changes and test new features or design changes. The aim of the staging environment is to help you make the changes and see how a live website will look without disrupting the site that’s already up and running.
You’ll also need access to the production environment to track the progress of the changes that you make on a cloned website. The production environment is the audience-facing side of the website, and any changes made here are directly pushed live.
Access to production environments is necessary to tally the changes made in staging and, once live, to see that everything works as it did in the staging environment.
2. Creating a Website Backup
This is an absolute necessity. Usually, there’s nothing to worry about when cloning websites. But in case things go wrong, you should have the backups ready.
Website files are precious, and the data it carries is important. With cloning or making any changes to the website, there’s always a slight risk of things going wrong. Without data backups, you can lose years of hard work.
There are several plugins and tools that you can use to create backups. Some examples include All-in-One WP Migration, UpdraftPlus, BackWPup, Duplicator, etc.
If you are a Cloudways user, you don’t need to worry about backups. Your site’s backups are already automated.

And if you want a backup just a few seconds before cloning, you can go to the Backup and Restore option in the Cloudways’ back panel and take the backup on-spot.
Note: Your site files and database are both backed up via this option.
Once these precautions are in place, it’s time to move on to clone your website on a staging environment where you’ll make the necessary changes. Here’s how you do it via different methods.
How to Clone a Website: 3 Easiest Methods
As discussed above, I will use a WordPress website as an example throughout this guide. There are multiple methods to clone a WordPress website, but in this guide, I will cover the 3 easiest ones:
- Clone a Website Using Your Hosting Provider
- Clone a Website Using a WordPress Plugin
- Clone a Website Manually
But before we go on to the processes, there are several things that you need to visit.
Method 1: Clone a Website Using Your Hosting Provider
Cloudways specializes in WordPress hosting, allowing you to clone your website on the same and/or another server on its Platform. This saves a lot of complexities and reduces the steps of the process. Here’s how you can clone the website using Cloudways:
1. Simply go to the application you wish to clone. Here I’ve created a test server to show you the exact steps.
2. Once you click the application of your choice, you’ll see the screen as shown below. You need to hover over the button that’s circled in red.
3. Once done, you’ll see 3 options. To duplicate a website, click Clone App/Create Staging.
4. A popup will appear asking if the customer wants to Clone App or Create Staging. Click the dropdown, select the server on which you want to create a copy of the website, and click Continue.
The Cloudways Platform takes a few minutes to copy a website.
Note that “Clone App” and “Create as Staging” are different in nature.
Clone App only clones a website while in the process of creating a staging site; both the live and staged applications are synced so that you can perform Push/Pull actions on both the replica and live versions.
5. Once done, you’ll see a cloned version of your application. And the credentials shown under the Admin Panel heading will be your access to the back panel of your cloned site.
The other way to clone a website is via WordPress plugins. Let’s see how that’s done.
Method 2: Clone a Website Using a WordPress Plugin
Like every other aspect of website management, WordPress has a lot of plugins that can be used to clone a WordPress website.
One is All-in-One WP Migration, a simple and easy way to use a backup and migration plugin for cloning a website. It allows you to export and import your existing WordPress website at a new location.
Within your old WordPress installation, navigate to Plugins → Add New, search for All-in-One WP Migration, and Install and Activate the plugin.
From the left pane, navigate to All-in-One WP Migration → Export Click the Export to and select File.
Wait a few seconds, and a popup will appear asking you to download the backup.
Download the file to your computer; the format will be .wpress. Keep it safe, as you will need it in the next steps.
Install a fresh WordPress on the new location, log in, and install the All-in-One WP Migration plugin. From the left pane, navigate to All-in-One WP Migration → Import, click the Import from, and select File.
Browse the previously downloaded .wpress file.
Note: There is a chance that you might see the warning “Your file exceeds the maximum upload size for this site”. To deal with the issue, please refer to How to Increase Media File Maximum Upload Size in WordPress.
The process takes a while as it involves uploading and extracting the .wpress file. Once done, you will get a popup with a warning. Click Proceed.
On the next popup, click Save permalinks structure.
You will be taken to the WordPress login page. Log in with the admin credentials of your old WordPress installation (because the original database has been replaced with the old WordPress website’s database). Click Save Changes on the Permalinks tab, and you are done!
Method 3: Clone a Website Manually
The manual process involves compressing all WordPress files and folders, exporting the old database, and importing the WordPress files and database to the new location.
Here are the steps to copy a website to a new location or the hosting provider.
- Compress WordPress Files
- Upload the Compressed File
- Migrate the Database
- Update the wp-config.php
1. Compress WordPress Files
First of all, navigate to the public_html directory of your WordPress installation, select all files, and compress them into a single archive.
You now have a zip file in the public_html folder, and the URL will be example.com/FILE_NAME.zip.
Now, you have two options – either download the zip file and upload it to the new location via an FTP client like FileZilla or upload the zip file to the new location directly via SSH [faster than the FTP upload].
2. Upload The Compressed File
In my example, I will use SSH because of the speed advantage. I logged into the new hosting location via SSH and browsed to the location/folder where I wanted a copy of my WordPress website. Ensure the folder is empty (if not, use the following command to remove everything).
rm -rf *
Important: The deletion process is irreversible. So before executing a command, move all important files and folders to a safe location.
Now, use the following command to download the generated zip file.
wget URL_OF_ZIP_FILE
Don’t forget to replace the URL_OF_ZIP_FILE with the actual URL of the zip file. Next, use the following command to unzip it.
unzip FILE_NAME.zip
All folders and files will be extracted in the target folder.
3. Database Migration
After copying web files, the next step involves exporting the database from the current location and importing it to the new location.
Login to your database manager (phpMyAdmin is a popular choice). Select your database and navigate to Export. Download the exported .sql file.
Log in to the new database manager, create a database, and navigate to Import. If you already have a database, simply import the downloaded .sql file.
Click Choose File and upload the previously downloaded .sql file.
4. Update the wp-config.php
Since the website is already up and running, the wp-config.php file needs to be updated to connect the WordPress installation on the new location with the new database.
Get to the public_html folder, open the wp-config.php file, and enter the new database credentials.
If you still see old URLs anywhere on the website, replace them using the Better Search Replace plugin.
Following one of the above methods, you can clone a website from one location to another. Generally, three steps are involved: Move the web files, Export & Import Database, and update the configuration file.
Now that you are done with cloning, it’s time to get to work. Once the site is staged, there are several issues that you’d want to address. Let’s discuss a few.
Troubleshooting Common Site Issues After Cloning
Cloning a website is usually done to resolve an issue on an existing website. But, doing it directly in the production environment risks rupturing the site. It’s always best to test in the staging environment.
Here are some common issues to address after cloning:
1. Broken Links
Broken links are a bad omen for any website. These are links that display errors when clicked. Google treats broken links as a negative sign and can take down your rankings.
This is a common issue with big websites with many pages. When satisfied with the results, you can check and fix the broken links on the staging environment and push the site live.
Some plugins you can use to fix broken links are Broken Link Checker, Link Checker Professional, and Link Whisper.
2. Checking Plugins
WordPress runs on plugins. That’s truly a blessing because there’s a plugin ready as a solution for any functionality you can think of. But, testing some sensitive plugins or installing new ones directly in the production environment can be a risk.
Especially if you have a high-functioning site with thousands of visitors and customers visiting regularly, not all plugins are always compatible with WordPress themes or customizations. So checking your plugins in the safe zone is always better before taking them live.
3. Performance Optimization
Improving the website’s performance is essential to offer a seamless experience to visitors. It can include anything from design modifications to trimming content for a better experience.
Performance optimization can also mean overhauling your website and changing the theme. This part can require many changes, and it’s always best to execute it in a staging environment first and then push the changes live.
Once the changes are made and functionality is thoroughly checked, you can take things live. There are very slim chances that what runs well in the staging environment will create mishaps in the production environment. Rarely happens.
Yet, it’s also best to thoroughly check the site after it goes live. And if you are a Cloudways user, you should have it backed up from the first moment.
Summary
Cloning a website has several uses. And benefits as well. We’ve discussed the common methods used. There’s nothing much technical about it.
And unless you are someone with at least moderate technical knowledge up your sleeves, you should completely avoid the manual method. Getting things done via the backend of Cloudways or plugins is super easy.
And that’s it from my side. I hope that your cloning process will be smooth sailing from here on!
Mansoor Ahmed Khan
Been in content marketing since 2014, and I still get a kick out of creating stories that resonate with the target audience and drive results. At Cloudways by DigitalOcean (a leading cloud hosting company, btw!), I lead a dream team of content creators. Together, we brainstorm, write, and churn out awesome content across all the channels: blogs, social media, emails, you name it! You can reach out to me at [email protected].